Tuesday, February 1, 2011

Skirt & Belt to Bag Tutorial


I found some super cute skirts that would never fit my tushy when I went out
Bargin Shopping last week.
I still picked them up because I wanted them. Didn't know for what at the time but...
 I WANTED THEM!!
Isn't that all that really matters?


This is my local "dive" LOL


as in "dive in" and grab stuff!!
They are cool cuz they have a bin on the side of the building where they put freebies.
You can grab and have as much as you want from it. This is where I get most of the material I use.
Skirts are the best because it's a large chunk of material you can use.

This is the skirt we will be Tute'n with this week.
Let me say however that my pictures are having issues and I had to use photobucket which made this turn into way more work to create a tute than it was to make the silly thng at all!!!
GRRR TECHNOLOGY!!


Here are the belts I got as well;

These will make the purse strap. (well one will) LOL


First turn your skirt inside out.

If it has a lining this is great. It's easier to sew the lining up and
 just leave the shape of your skirt for the bag.

Photobucket

Sew around the edges and bottom

Photobucket

Photobucket

Pull liner out and sew across bottom
I have to mention I have no patience to pin and iron and all thay yadda so,
I justgo by sight and if I mess it up, it's mine to deal with. To me that is what makes it handmade.

Photobucket

This is where my photos were being jerks so I don't have all my shots.
Here you can see the liner sewed but on the exterior.

Photobucket Photobucket Photobucket

Photobucket Photobucket Photobucket

Here I took the belt and buckled it and pulled it to make it in halvsies and cut it.
I then touched superglue on the parts that could unravel.
Then I took the E6000 and attached it to the skirt in the proper locations to make a strap.

Photobucket

Here she is. I know this is a lame-o tute, but I'm frustrated on so many levels.
At least the purse is cute RIGHT?

HUMOR ME!!!


This is a few of the others I have done.
My first one:

Photobucket

My second strap and has to be my favorite!!


Photobucket


Enhanced by Zemanta

Monday, January 31, 2011

Tute'n Tuesday ~ Apparently my LAST :(


This linky is for all those who want to hype their tutorials. I won't delete you if there isn't a tute, but I am really wanting this to be the place we can share what we are making and make it easy for someone else to make it too. I am totally new to this so it may be rough the first few times. I am hoping to get an awesome following so share this with everyone!!

I just got this notice when I logged in:
ADMINISTRATIVE MESSAGES:
•VERY IMPORTANT MESSAGE:

Linky Tools has grown to over 16,000 users and I can no longer continue to pay all the expenses out of my own pocket to keep it free as I have done for a couple of years. Ads and donations are not working. I have to go to a subscription service.
To keep your account from being DEACTIVATED on February 7th, please go here and read this notice. THIS IS A GENERAL INFORMATION NOTICE... IF YOU HAVE PAID, YOU'RE GOOD TO GO.


I can't afford to do this I know it's not much but I seriously can't do it.
So I will be ending my linky before it even really gets off the blog floor.
No worries I will be linking to all those who have paid. LOL

Thanks for joining and trying to help my blog.

Everything is welcome but tutorials are a PLUS!

Photobucket


Saturday, January 29, 2011

Nails on a Budget


I love the look of pretty french tip nails.


I think they are professional looking and sophisticated all at once.

However, I do love the crazy stuff too!


Ok so these are a little too much for moi! But I still think they are cool to look at.

We first start with a nice package of predesigned tips at your local store.


Then you lay them out after you size them to your fingers.
Make sure the tip covers your entire nail.


You need to take a rough file and scuff up your natural nails.


They should look like this:


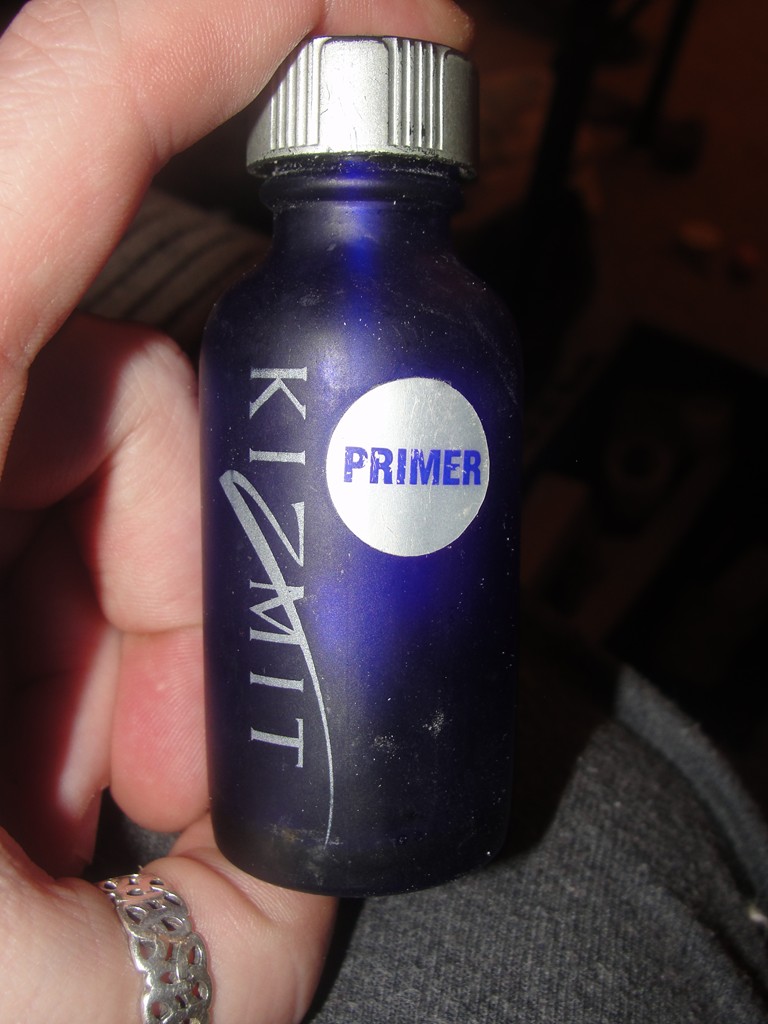
You then need to prime your nails.
There is a primer in the kit you buy at Wal-Mart.
But the kind shown here is at Sally's Beauty Supply.


There is also a liquid and powder in the kit from Wal-Mart


I have some from Sally's I have been using.


Next you need to fill your little cup.

Then you take the brush and dip it in the liquid and then into the powder.
Place this on the inside of the tip. It will be a runny substance.
This is how it should be. Then set brush down and press the tip on your natural nail.
Hold and count to 50. I usually have some squeeze out the top.
I then take the plastic end of the brush and swipe it out before it hardens.

This is how they look.
They should last at least 2 weeks just like when you go to the salon.
Initial cost for kit is around $10 -$15 bucks
And it lasts for what seems like ever. 
Then you only have the $5 dollar cost every time you change your tips.

They are way more sturdy than putting them on with the glue!


Enhanced by Zemanta

Friday, January 28, 2011

Friday Photo Flashback

I just knew I had to participate in this!!


So here is me my sis & my Momma in a VINTAGE photo!!


Here is the same moment but the kids!!

Yep that's me on the left! You just have to appreciate the shorty shorts right?

One more for the road!


My Granny & Grandad with their FAB car!!!

Totally love this idea I will do it every week if she is!!

(heart) NIKKI